How to Run a Game Playtest That Gives You Useful Feedback

Your friends will tell you your game is good. Other devs will tell you what they would have built instead. Neither of those is playtest feedback, and both of them will waste weeks of your development time if you treat them as data.

A useful playtest is a controlled situation where you learn something specific about how strangers behave in your game. Here is how to set one up.

Decide what you are testing before you invite anyone

“Come try my game” is not a playtest. It is a demo.

Before you schedule anything, write down one question you want answered. Examples:

  • Can a new player get through the first five minutes without asking me anything?
  • Do players understand that the blue meter is stamina?
  • Is the third level too hard, or is the second level not teaching enough?
  • Do players use the dodge, or do they tank hits and heal?

One question per session. If you try to test the tutorial, the combat balance, and the art direction at once, you will get vague impressions of all three and answers to none of them.

Who to test with

The biggest recruiting mistake is testing only with people who already like your genre. They will fill in gaps automatically because they have played forty games like yours. They will not notice that your controls are unexplained, because they already know the convention.

Mix your pool:

  • Genre fans. Good for balance, depth, and whether your systems hold up.
  • Genre-adjacent players. Good for onboarding and clarity.
  • People who barely play games. Brutal and extremely useful for your first five minutes.
  • Other developers. Useful, but hold their feedback separately. Devs critique implementation and pitch alternatives. That is a different signal than “I did not know where to go.”

Avoid testing repeatedly with the same handful of people. After the second session they know your game and stop being able to see it fresh.

For usability problems, five testers will surface the large majority of the issues. If four out of five people walk past the same door, the door is the problem, and testing fifteen more people will just confirm it more expensively.

Balance and difficulty tuning need more, because those depend on skill spread. Onboarding and clarity need very few.

Running the session

Say almost nothing

Hand them the controller or the keyboard. Tell them two things: think out loud if you can, and I am not going to help you. Then stop talking.

This is the hardest part and the part everyone fails. Watching someone struggle with something you built is physically uncomfortable, and the instinct to say “oh, you have to press X there” is nearly irresistible. Every time you give in, you delete the exact information you invited them over to produce. Your game will not have you sitting next to it on Steam.

Write down the moment you wanted to intervene. That moment is a bug in your design. Take notes on what they do, not how they seem to feel:

  • Where did they pause?
  • What did they try that did not work?
  • What did they ignore entirely?
  • What did they do repeatedly that you did not intend?
  • Where did they die, and did they understand why?
  • When did they check the menu, and what were they looking for?

Timestamps help. If you can record the screen, do it. Face cam is optional and mostly useful for spotting confusion versus frustration.

Thirty to forty-five minutes is plenty for most sessions. Past that, testers get tired and start being agreeable to end it faster.

Asking questions afterward, not during

Save your questions for the end, and ask about what happened rather than what they thought.

Bad questions:

  • Did you like it?
  • Was it fun?
  • Would you buy this?
  • Do you think I should add multiplayer?

These invite politeness, speculation, and design suggestions, in that order.

Better questions:

  • What were you trying to do when you were stuck at the bridge?
  • What did you think that item was going to do?
  • How would you describe this game to a friend?
  • What was the most frustrating part?
  • If you stopped playing at some point, when and why?

“How would you describe this game to a friend” is worth asking every time. If their description does not match your pitch, your game is not communicating what you think it is.

Players identify problems well and solve them badly

Take this one seriously. A tester saying “the combat felt slow” is real information. That same tester saying “you should double the attack speed” is a guess.

Your job is to hear the complaint and diagnose the cause yourself. Slow combat might be attack speed, or it might be enemy health, hit feedback, wind-up animation, or the fact that the player never found the weapon upgrade. The fix is often nowhere near the thing they pointed at.

The same applies to feature requests. If three people ask for a minimap, the actual problem is usually that your levels are hard to navigate, and a minimap is the only solution they know how to name.

When to ignore feedback

Not all of it counts. Reasonable grounds for setting a piece of feedback aside:

  • One person said it and nobody else did
  • It came from someone outside your audience
  • It contradicts the core thing your game is about
  • It is a preference, not a problem

Log it anyway. If the same “one-off” shows up in three more sessions, it was never a one-off.

Remote playtesting

In-person is better for observation, but remote scales. Options:

  • Steam Playtest. Built into Steamworks, ties to your store page, and testers already have Steam accounts.
  • itch.io with a password-protected page. Fast and free.
  • A Discord server with a testers channel. Good for ongoing feedback, and lets you ask follow-ups.

For remote, you lose the ability to watch. Compensate with a short structured form, in-game telemetry if you can manage it, or by asking testers to record their session.

Team of young computer programmers and graphic designers cooperating in the office, creating new video game.

Log everything and look for repeats

Keep one document per session with the date, tester, build version, and your raw notes. After three or four sessions, read them together and look only for repeats. Anything that shows up three times is a priority. Anything that shows up once goes in a backlog.

This is also how you avoid re-fixing things. Without a log, you will get the same feedback in month four that you already addressed in month two, panic, and change something that was fine.

Getting testers

If you do not have a pool yet, the fastest path is a local community. Bring a build to an SDC meetup or the Progressive Game Jam and trade sessions with other devs. Test each other’s games, take real notes, and swap. It costs you nothing but an evening, and it beats waiting for strangers on the internet to volunteer.

Convention floors work too, with one adjustment: shorten your build. A con demo has about ninety seconds to prove itself before someone drifts to the next booth.


None of this requires a finished game. The earlier you start watching people play, the cheaper your mistakes are. A rough build tested in month two saves you from shipping a tutorial that nobody understands in month twenty. Grab five people, keep your mouth shut, and take notes.

Building a Press Kit for Your First Game

Most indie devs build a press kit the week they need one, which is usually the week a journalist or streamer has already moved on to something else. The people who cover games are working through a lot of pitches, and the ones that get covered are frequently just the ones that were easiest to cover. A press kit is how you make yourself easy.

Here is what to put in one, where to host it, and the mistakes that kill an otherwise good pitch.

Have it live before you announce

The press kit should exist before your first announcement post, not after. The moment your trailer goes up, people who might write about you will look for assets. If there is nothing to find, they will either email you and wait, or move on. Assume they will move on.

A rough press kit that exists today beats a polished one that goes live next month.

Where to host it

Put it on a domain you control. yourgame.com/press is ideal. If you do not have a site, a free option is Rami Ismail’s presskit() tool, which is built specifically for this and used across the industry. Itch.io pages also work in a pinch.

Do not use a Google Drive folder as your press kit. Permissions break, previews fail, and half the time the person clicking your link gets a request-access screen instead of your screenshots.

Your Steam page is also not a press kit. It is a store listing. It does not let people download raw assets, and it does not include your contact info.

What goes in it

A fact sheet

Short, scannable, at the top. Include:

  • Game title, exactly as it should be written
  • Developer name and location
  • Publisher, if you have one
  • Release date, or “TBA” if you honestly do not know
  • Platforms
  • Price
  • Steam, itch, and console store links
  • Content rating, if you have one

Writers copy this block verbatim into their piece. Make it correct.

Descriptions at three lengths

Write your game description three times:

  1. One sentence. Under 20 words. This is what someone tweets or drops in a Discord.
  2. One paragraph. Three or four sentences covering the hook, the genre, and what makes it different.
  3. The long version. Two or three paragraphs with mechanics, setting, and features.

Different outlets need different lengths. If you only provide one, someone has to rewrite it, and rewrites introduce errors.

Screenshots

Five to ten, minimum 1920×1080, PNG. A few rules that matter more than people expect:

  • Include a mix of shots with UI and shots without. Clean shots get used as article headers. UI shots show what the game actually plays like.
  • No debug overlays, no placeholder text, no FPS counters.
  • Show variety. Different environments, different mechanics, different moments.
  • Name the files something useful. buluk_combat_temple_01.png beats Screenshot 2026-08-14 at 3.42.11 PM.png.

Key art and logo

Your logo as a transparent PNG, in both light and dark versions if your logo has contrast issues on one or the other. Key art at full resolution. If you have a Steam capsule, include it.

Trailer

Link to it on YouTube. Also provide a direct download of the MP4, because some outlets host video themselves rather than embedding.

If you have a short GIF or a 10-second clip of your best mechanic, include that too. Social posts eat GIFs.

Developer info

A short bio for you or your studio. Two or three sentences. Where you are based, what you have made before, how many people are on the team. If this is your first game, say that. Solo dev and first-time dev are both angles that people write about.

Contact

An email address that a human checks. Not a contact form. Not a Discord invite. An email.

Add your social handles and, if you have one, a press-only Discord or mailing list.

Everything as a downloadable zip

Alongside the browsable page, offer one zip with all the assets in it. Someone writing on deadline will grab the zip instead of right-clicking twelve images.

Handling review keys

Say up front whether keys are available and how to request them. If you use a key distribution service like Keymailer, Woovit, or Terminals, link it. If you are handling keys manually, say so and give the email.

Two things worth doing: keep a spreadsheet of who you sent keys to and when, and do not send keys blind to anyone who emails asking. Key resellers scrape press kits. A quick look at whether the requester has an actual channel or byline takes 30 seconds.

Mistakes that come up constantly

No contact email anywhere on the page. Extremely common. Fix it first.

Watermarked screenshots. Nobody will run an image with your logo pasted in the corner. Provide clean ones.

Only having a trailer. Video is hard to embed in an article. Stills do the heavy lifting.

Low-resolution assets. If a site wants to run your key art as a header image, 800px wide does not work.

No release date, not even a window. “2026” or “Q2 2026” is better than silence. Coverage gets scheduled around dates.

Never updating it. When your release date changes, when you add platforms, when you hit a milestone, update the kit. A press kit that still says “coming 2025” tells people you stopped caring.

Keep a running assets folder

The practical version of all this: make a folder now. Every time you capture something good in your game, drop it in. Every time you write a decent description of the project for a jam page or a Discord, save it. When it comes time to build the actual page, you will be assembling rather than starting from nothing.

Same goes for your build process. If you can hit a key in-game to capture a clean screenshot with UI hidden, set that up early. Six months of accumulated screenshots is a better press kit than an afternoon of frantic capturing.

The short version

Domain you control. Fact sheet, three description lengths, ten good screenshots, logo, key art, trailer, dev bio, working email, and a zip of everything. Live before you announce, updated when things change.

That is most of what separates a game that gets written about from a game that does not get written about for reasons unrelated to the game.

Turning A Launched Game Into A Lasting Hit

You hit publish, watched the first downloads roll in, and maybe celebrated a little. Then the numbers slowed down. That is the moment most teams realize something important. Launch day is not the finish line. It is the start of a new kind of work.

Post-launch marketing is about keeping your game discoverable, giving people reasons to care, and turning early players into a real community. You do not need a giant budget, but you do need a clear plan.

Below is a practical guide on how to market your game after it is already out in the wild.


Start with your storefront

Before you think about ads or influencers, make sure the places that actually sell your game are doing their job. That usually means your Steam page, console store listing, or mobile store page. Most players decide in a few seconds whether they are interested or not, so the basics need to be strong.

Look at your capsule art first. Ask yourself if a stranger could tell the genre just by glancing at it. The art should read clearly, even when it is tiny in a grid of other games. If it feels cluttered or generic, it might be worth commissioning a new main image or at least a tighter crop that shows your core fantasy more clearly.

Then review your trailer. A lot of launch trailers spend too much time on logos, story setups, or slow pans. For the store page, you usually want something that shows actual gameplay within the first few seconds. Think of it as proof that your screenshots are real. Trim anything that does not quickly show what it feels like to play.

Screenshots are next. Make sure they show real, exciting moments from the game rather than menus and empty rooms. Include shots that show your core loop, combat or tension if you have it, and some sense of variety so players understand the experience is not one note.

Finally, clean up your store text and tags. Use clear language that explains what the player does, how long the game is, and what makes it special. Avoid vague marketing phrases. Imagine the search terms your ideal player might use and make sure those ideas appear naturally in your description and tags.

A stronger storefront means every person you send to that page is more likely to buy, which makes all of your other marketing work more effective.


Treat the game as a living thing

A lot of players hesitate to buy a new game because they worry it will be abandoned. Even a small update plan can change that perception. You do not need a giant public roadmap, but you should have a simple answer to one question. Why should someone come back next week or next month?

Focus on a few lightweight commitments you can keep. That might mean regular bug fixing and performance patches, a steady trickle of quality of life improvements, and occasional content drops that feel meaningful, even if they are modest in size. You can also experiment with small events, like time-limited modes or community challenges, that give people a reason to log back in now instead of “someday.”

The key is consistency. Players would rather see one small update every few weeks than promises of huge expansions that never arrive. Under promise and over-deliver whenever you can.


Build a real community, not just an audience

Once the game is out, your community becomes the heart of your marketing. People are far more likely to try a game if they see other players talking about it, sharing clips, or recommending it directly.

Pick one or two primary homes for your community and commit to actually showing up there. For many indie teams, that means a Discord server and the Steam discussion boards. It can also include a Reddit community or a channel in a larger server if that is where your genre already lives.

In those spaces, be present and human. Reply to questions, thank people for feedback, and be honest about what you can and cannot do. Share work-in-progress images, early patch notes, or design thoughts so players can see that the game is evolving.

Make it easy for players to be visible too. Highlight fan art, cool builds, speedruns, or funny clips. A simple “community spotlight” post each week can go a long way. When players feel seen, they are more likely to stick around and bring their friends.


Work with creators as partners

Content creators, streamers, podcasters, and YouTubers are often more important than traditional press, especially for certain genres. The challenge is that they get buried in generic “please cover my game” emails. Your goal is to be the opposite of that.

Create a simple press or creator kit that lives online. It should include a short pitch in plain, direct language, a few strong screenshots and logos, and a link to your best trailer or some raw gameplay clips. Having everything in one clean place makes it much easier for a busy creator to say yes.

When you reach out, start with mid-sized creators who already enjoy games like yours. Watch some of their content first so you understand their style. Then send a short, personal message explaining why your game fits their channel and offer them a key, early access to an update, or something that genuinely helps them make an interesting video.

If a creator actually likes your game, stay in touch. Share upcoming features, ask what their audience reacted to, and consider inviting them to try betas or special builds. Long-term relationships with a few creators are more valuable than one big spike you never repeat.


Go where discovery really happens

Players do not just learn about games from big websites anymore. A lot of discovery happens in short-form video feeds, Discord communities, and through friends. That is good news, because you do not need permission from a gatekeeper to reach people there.

One of the easiest things you can do is start posting short clips regularly. Capture interesting moments: a satisfying combo, a clever puzzle solution, a wild bug, or a funny failure. Edit the clip so the interesting part happens immediately, add very light context if it needs it, and post it to places like TikTok, YouTube Shorts, and Instagram Reels. Imperfect but frequency is better than polished but rare.

If you are comfortable on camera, consider simple devlog videos. After launch, talk through what changed in the latest patch, why you made certain choices, and what you are considering next. Players like to see the human being behind the game they bought.

Do not forget about events. Even post-launch, digital festivals and physical shows can give your game a second wind. A new demo for an update, a fresh trailer in an online showcase, or showing at a local convention can introduce you to players who missed your original launch entirely.


Use discounts and bundles with intent

Price changes are not just a financial decision. They are a marketing tool.

You generally want to avoid deep discounts too quickly, or you will train your potential audience to wait. Instead, tie discounts to something that feels like news. For example, run a sale when you ship a substantial update, celebrate an anniversary, or participate in a platform-wide event. That gives you a clear story to tell.

Bundles are another way to reach new players. If you know other developers who make games with a similar audience, consider teaming up for a themed bundle. Players who buy for one title might discover the others in the pack. This can be especially powerful on PC storefronts that support flexible bundling.

On mobile, “discounts” often take the form of in-app promotions rather than price cuts on the app itself. The idea is similar. Create short windows where the perceived value is higher, communicate those windows clearly, and avoid making discounts so constant that your full price stops feeling real.


Let data guide your next move

It is easy to get emotionally attached to particular marketing ideas. Maybe you love a trailer cut that underperforms, or you are sure a certain feature will bring people back but the numbers disagree. Data helps you move past that and focus on what actually works.

Set a simple habit of checking your key metrics once a week. Look at store page traffic and how many visitors convert into buyers. Watch how wishlists are changing and how many of them turn into purchases during launches or sales. Track daily active players, returning players, and basic retention for games that rely on ongoing engagement.

When you post a new trailer, run a community event, or push a big update, watch what happens in the numbers. If a particular type of post, video, or patch consistently leads to small bumps in traffic and sales, lean into that pattern. If something falls flat, treat it as an experiment and try a different angle next time.


A simple 30-day post-launch plan

If all of this feels overwhelming, break it into a month of focused effort with a few clear priorities each week.

In the first week, polish your storefront. Update capsule art if it needs it, replace or trim your store trailer to focus on gameplay, and rewrite your description so it is clear and direct. At the same time, set up or tidy your main community hub, whether that is Discord, Steam discussions, or somewhere else.

In the second week, communicate clearly about the future. Post a short message that explains what is coming next for the game, even if it is a small list. Ship at least one patch that improves stability or quality of life, and share what changed. Start posting a few short gameplay clips on your main social platform to remind people the game exists and show it in motion.

In the third week, focus on relationships. Reach out to a list of mid-sized creators who play similar games, using your creator kit and personal messages. Host a small community event or Q and A, maybe a developer play session or a live stream where you talk through a patch. Collect feedback from players and decide on a small set of changes you can realistically make in the near future.

In the fourth week, act on what you learned. Ship another update that incorporates some of the feedback you gathered. Announce a limited-time discount or in-game event that ties into that update, so there is a clear reason for new and returning players to jump in. Share the highlights of the patch, the best community clips, and any creator coverage you received across your channels.

At the end of those 30 days, step back and look at the whole picture. Check your data, listen to your community, and be honest about what you enjoyed and what felt like a grind. Keep the habits that moved the needle and felt sustainable, drop the ones that did not, and plan your next month around that.

You do not need to be everywhere or master every tactic. Post-launch marketing is about steady, human effort that keeps your game visible, keeps your players engaged, and keeps you learning as you go.

Getting Started With Unity

A friendly guide for your first game

Unity can feel huge when you first open it. Windows everywhere, new terms, and about ten different ways to do anything. The good news is you do not need to learn everything at once. If you can install Unity, move a little cube around, and hit Play without fear, you are already on the right path.

This guide is written for first-time devs, students, and hobbyists who want to make their first small game with Unity.


Why Unity is a solid first engine

Unity is popular for a few simple reasons:

  • It runs on most decent laptops and desktops.
  • You can build both 2D and 3D games.
  • Most tutorials you find online assume zero experience.

You will write code in C#, but you do not need to be a “real programmer” before you start. Unity is a great place to learn programming by doing.


Step 1: Install Unity the right way

Unity is managed through a small app called Unity Hub. The Hub handles versions, projects, and add-ons.

When you install:

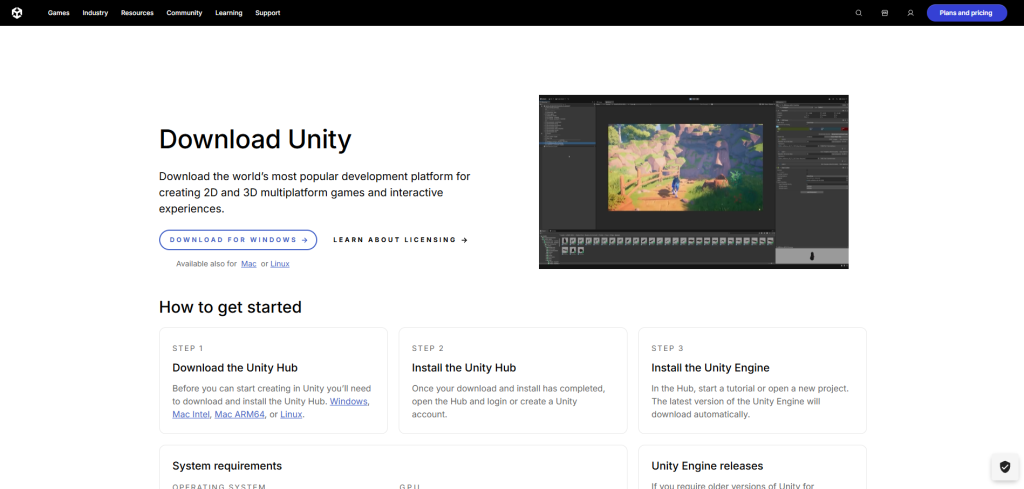
  1. Install Unity Hub.
  2. Inside the Hub, add a Unity Editor version. Look for a recent “LTS” version. LTS means “long-term support” and is usually the safest choice for beginners.
  3. When you add the editor, select at least one build target, like Windows or Mac. You can add more later if you want to ship to consoles or mobile.

Once the editor is installed, you are ready to make a project.


Step 2: Create your first project

In Unity Hub:

  1. Click “New project.”
  2. Pick a template. For your very first game, a 2D or simple 3D template is enough.
  3. Name your project and choose a folder where it will live. Avoid syncing it directly with cloud services at first, since that can cause build issues.

When Unity opens, it will generate a starter Scene for you.


Step 3: Learn the core pieces of the editor

Unity looks busy, but most of your day will revolve around a few key areas.

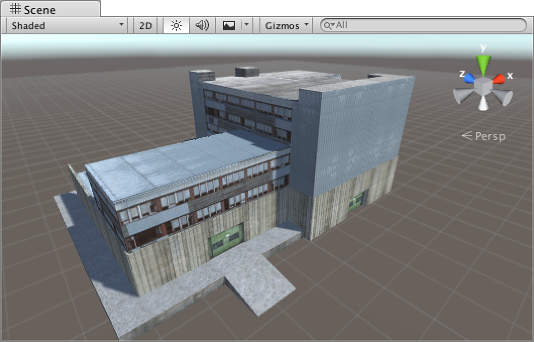
  • Scene view
    This is where you place and move things in your game world. Think of it as your level editor.
  • Game view
    This is what the player actually sees when the game runs.
  • Hierarchy
    A list of every object in your current Scene. If the Scene is your stage, the Hierarchy is the cast list.
  • Inspector
    This shows the details for whatever you have selected. Position, rotation, scripts, sprites, audio, and more all live here.
  • Project window
    This is your file browser inside Unity. All your assets, scripts, and Scenes appear here.

The most important concept in Unity is this:

Everything in your game world is a GameObject, and it is built out of Components.

A GameObject is just a container. Components give it behavior and data. For example:

  • A Transform component tells Unity where the object is.
  • A Sprite Renderer component tells Unity what it looks like.
  • A Script component tells Unity how it behaves.

Once that clicks, the editor starts to feel less mysterious.


Step 4: Make something move with your first script

Let us give you a tiny win: move a cube around with the keyboard.

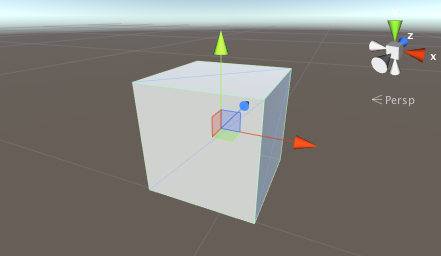
  1. In the Hierarchy, right-click and create a Cube (in a 3D project) or a simple Sprite (in 2D).
  2. Select the object and rename it to “Player.”
  3. In the Project window, create a new C# Script called PlayerController.
  4. Drag the PlayerController script from the Project window onto the Player object in the Hierarchy. This attaches it as a Component.
  5. Double-click the script to open it in your code editor.

Replace the contents with this:

using UnityEngine;

public class PlayerController : MonoBehaviour
{
public float moveSpeed = 5f;

void Update()
{
    float moveX = Input.GetAxis("Horizontal");
    float moveZ = Input.GetAxis("Vertical");

    Vector3 moveDirection = new Vector3(moveX, 0f, moveZ);
    transform.Translate(moveDirection * moveSpeed * Time.deltaTime, Space.World);
}

}

What this does:

  • moveSpeed controls how fast the object moves. You can tweak this in the Inspector while the game is not running.
  • Input.GetAxis("Horizontal") listens for A/D keys or left/right arrows.
  • Input.GetAxis("Vertical") listens for W/S or up/down arrows.
  • transform.Translate actually moves the object in world space.

Hit Play at the top of the editor, and you should be able to move your Player around.

If it does not work, that is normal. Check:

  • Is the script attached to the Player object in the Hierarchy?
  • Did you name the class and file PlayerController exactly the same.
  • Are there any red error messages in the Console window at the bottom?

Debugging is part of the learning process. You’re now doing real game development.


Step 5: Experiment without fear

A healthy Unity habit is to experiment in small steps and keep your wins.

A few ideas:

  • Duplicate your Scene before trying something wild. Right-click the Scene in the Project window and hit Duplicate. Now you have a safe copy.
  • Play with values in the Inspector. Change moveSpeed, the scale of the object and camera position to see how each one affects the game.
  • Use Play mode as a sandbox. When you hit Play, you can adjust values and see instant results. Just remember, changes made while playing do not save after you stop, so keep notes on values you like.

The more you poke around, the less intimidating the editor feels.


Step 6: Make a tiny game, not a giant one

Almost everyone starts with “I want to build an open world RPG” and then gets crushed by the scope. For your first Unity project, keep it small on purpose.

Good first game ideas:

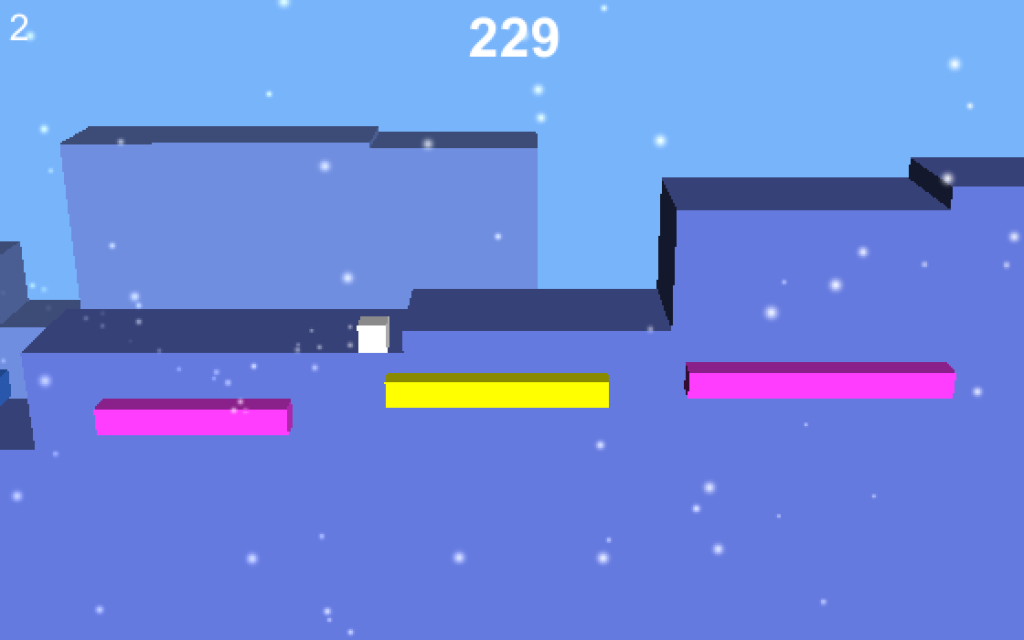
  • A simple endless runner where you avoid obstacles.
  • A top down game where you move a character and collect coins.
  • A basic platformer with one or two levels.

Focus on finishing something that feels complete, even if it is short.

You will learn far more from one tiny finished game than from ten half complete “dream projects.”


Step 7: What to learn next

Once you have moved a cube and made a tiny prototype, here are good next topics to explore:

  • Prefabs, so you can reuse objects without rebuilding them every time.
  • Collisions and physics, to detect hits and movement.
  • UI basics, such as score counters and health bars.
  • Scenes and simple menus, so you can restart or go back to a title screen.

And if you are in a community like SDC, bring your early builds to meetups or jams. You will get feedback, encouragement, and probably a few bug reports you never would have found alone.